Cathode Ray Tube (CRT) monitors, though largely replaced by modern flat panel displays, still exist in some households and workplaces. If you’re a hobbyist, repair technician, or even someone trying to safely dispose of old electronics, you must know that CRT monitors store high voltage even when they’re unplugged. Discharging them safely is critical to avoid severe electric shock. This guide will provide a thorough step-by-step process on how to discharge a CRT monitor.
Understanding CRT Monitors
CRT monitors contain a high-voltage capacitor that can keep a dangerous charge long after the monitor has been powered down. Here’s a snapshot of some common voltages you might encounter:
| Component | Voltage |
|---|---|
| CRT Anode | 10,000 to 30,000 volts |
| Capacitors | 200 to 400 volts |
Safety Precautions
Personal Safety
- Wear rubber-soled shoes
- Use only one hand if possible to minimize the risk of completing a circuit across your torso
- Avoid working alone; having someone nearby can be a lifesaver in emergencies
Tools Required
- Flat-blade screwdriver
- Alligator clip jumper wires
- Resistor (2 Megaohms, 5 Watts)
- Rubber gloves
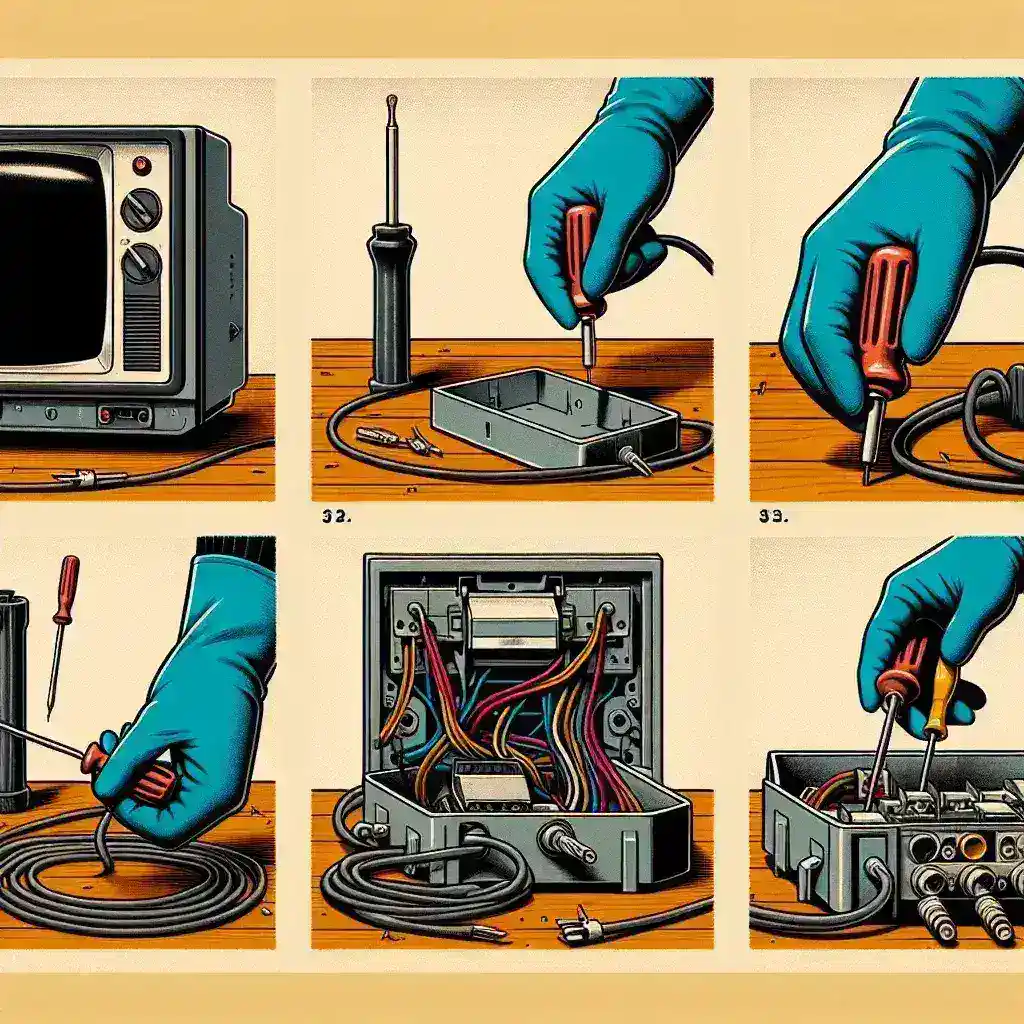
Step-By-Step Guide to Discharging a CRT Monitor
Step 1: Preparation
Before you start, ensure that the monitor is unplugged from any power source and left idle for at least 24 hours. The high-voltage anode will still hold a charge, so waiting ensures some of this charge dissipates naturally.
Step 2: Opening the Monitor
Use a screwdriver to remove the screws that hold the monitor’s case together. Carefully open the case, making sure not to touch any internal components.
Step 3: Grounding the Screwdriver
Attach one end of the alligator clip jumper wire to the metal shaft of the screwdriver and fix the other end to a ground point on the monitor or to another grounded source.
Step 4: Attaching Resistor
Connect the resistor between the alligator clip and the screwdriver to limit the electric current and safely discharge the CRT.
Step 5: Discharging the CRT
- Locate the anode cap (the suction cup shaped component) on the back of the CRT.
- With one hand behind your back, slide the grounded screwdriver under the anode cap.
- You might hear a popping sound, indicating the discharge. Keep the screwdriver in place for a few minutes to ensure complete discharge.
Step 6: Verify Discharge
After discharging, use a multimeter to check if any voltage remains. Connect the multimeter probes to the CRT’s anode and ground to verify it is fully discharged.
Storing and Handling CRT Components
After discharging, remember to handle all components carefully. Store them in a way that prevents recharging through static electricity or accidental short circuits.
Conclusion
Discharging a CRT monitor might appear daunting, but following safety guidelines can make it manageable and safe. Always prioritize your safety and make sure to follow each step carefully. Whether you’re repairing or disposing of a CRT monitor, understanding and executing the discharge process is essential.
Frequently Asked Questions (FAQs)
Q: Can I discharge a CRT monitor without a resistor?
A: While possible, it’s highly discouraged as it can lead to sudden discharge, potentially harming you or damaging the monitor’s components.
Q: How often should CRT monitors be discharged?
A: If you are continuously working on a CRT monitor, discharge it every time you start your work session to ensure safety.